Google Shopping Campaign Setup: SMB Quick–Launch Guide
Posted on
Marketing
Posted at

Setting up Google Shopping ads requires a verified Merchant Center, an accurate product feed, linked accounts, and proper conversion tracking.
A successful campaign involves building the feed, linking accounts, validating settings, creating structured campaigns, and monitoring feed health and KPIs over 60 to 90 days.
To run Google Shopping ads, you need four things working together: a verified Google Merchant Center account, a complete and accurate product feed, a live link between Merchant Center and Google Ads, and conversion tracking firing on your site. Get those four right, then launch a Standard Shopping campaign segmented by product groups. That sequence is the whole game.
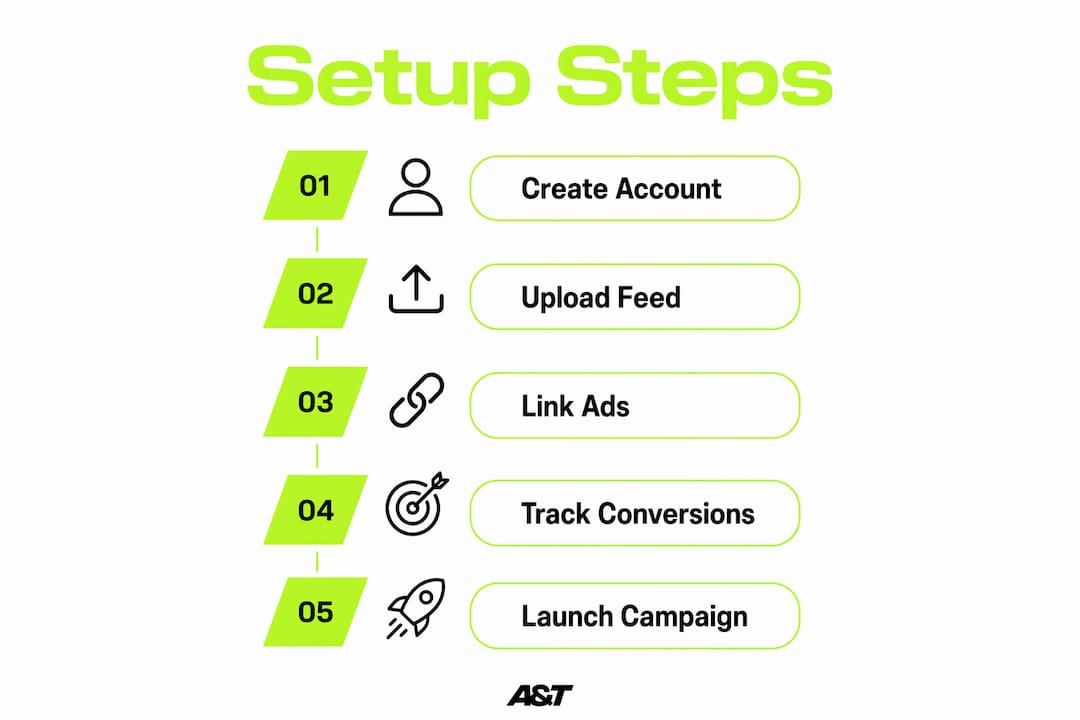
Here is your quick-start checklist before we go deep:
Open Google Merchant Center — create your account, verify and claim your domain, and complete business info, shipping, and tax settings.
Build or sync your product feed — export from Shopify, WooCommerce, or BigCommerce, or build a spreadsheet with required attributes (title, GTIN, price, availability, image link).
Link Merchant Center to Google Ads — confirm the link is active in both consoles before creating any campaign.
Enable conversion tracking — set up Google Ads conversion actions, GA4 ecommerce events, and enhanced conversions via Google Tag Manager.
Launch your campaign — Standard Shopping for control and data collection first; add Performance Max once you have stable conversion volume.
Feed validation typically takes 24–72 hours. First conversions usually appear within the first week if bids and budgets are sufficient. Plan for a multi-week window to build enough signal for Smart Bidding to work reliably.
One number worth knowing up front: feed quality is the dominant ranking signal for Shopping ads in 2026. Products with complete titles, GTINs, and high-quality images consistently outperform competitors in impressions and click-through rates, regardless of bid levels. Fix the feed before you touch bids.
Table of Contents
Which feed attributes actually move the needle on impressions and CTR?
How should you structure campaigns and bids for the first 60–90 days?
How do you set up tracking and measure Shopping performance?
What are the most common Shopping campaign errors and how do you fix them?
What does a 60–90 day Shopping campaign launch plan look like?
When should you DIY vs. hire a professional for Shopping setup?
Atdigiagency builds and manages your Shopping campaigns from day one
What do you need before setting up a Shopping campaign?
Skipping preflight checks is the fastest way to waste a week on disapprovals. Get these in order first.
Accounts and ownership
You need four accounts, all connected:
Google Merchant Center — the hub where your product data lives. Create it at merchants.google.com using the same Google account you use for Google Ads.
Google Ads — where campaigns, bids, and budgets live. Link it to Merchant Center before you create any campaign.
Google Analytics 4 (GA4) — for ecommerce event tracking, audience building, and attribution. Link GA4 to Google Ads so conversion data flows both ways.
Google Tag Manager — the container that fires your GA4 tags, Google Ads conversion tags, and enhanced conversion scripts without requiring a developer for every change.
Website requirements
Google checks your site before approving products. Your pages need clear pricing visible to all users, unique URLs for each product, a functioning checkout, mobile-friendly design, and visible return and shipping policies. Missing any of these triggers policy disapprovals that can block your entire account.
For Shopify merchants, the Google & YouTube app handles feed sync automatically and pushes product data directly to Merchant Center. WooCommerce sellers typically use the Google Listings & Ads plugin or a third-party feed tool. BigCommerce has a native Google Shopping channel integration that syncs inventory in real time.
Merchant Center settings to validate first
Before uploading a single product, confirm these four settings inside Merchant Center:
Domain verification and claim — verify via Google Search Console HTML tag or DNS record, then claim the domain.
Business information — legal business name, address, and customer-service contact.
Shipping settings — US sellers must configure at least one shipping service with accurate rates and delivery times. Google uses this to populate the shipping cost shown in your ad.
Tax settings — configure US tax by state. Google can auto-calculate sales tax for most states, but you need to confirm the setting is active.
Program opt-ins — confirm you are enrolled in both Shopping ads and Free listings under "Growth > Manage programs."
Pro Tip: Verify your top 10 SKUs first. Upload only those products in your initial feed submission. This surfaces the most common feed errors quickly, lets you fix them before they affect your full catalog, and gets at least some products approved and serving while you clean up the rest.
Feed errors on a handful of test SKUs are far easier to diagnose than a 5,000-item feed with 800 disapprovals. Start small, fix fast, then scale the upload.
How do you set up a Google Shopping campaign step by step?
This is the exact sequence. Follow it in order; skipping steps creates account-linking errors that are annoying to untangle later.
Step 1: Create and verify your Merchant Center account
Go to merchants.google.com and sign in with your Google account. Enter your business name, country, and time zone. Under "Business information," add your store URL. Then verify your domain using one of three methods: Google Search Console (fastest if already set up), HTML tag added to your site's <head>, or DNS TXT record via your domain registrar. After verification, click "Claim" to associate the domain exclusively with your Merchant Center account.

Step 2: Build and upload your product feed
Shopping adsare generated from product data in Merchant Center, not from keywords. Google reads your feed attributes and matches them to relevant search queries. That means your feed is your ad copy.
Required attributes for every product:
id— unique SKU or product identifiertitle— the most important ranking attributedescription— detailed product descriptionlink— canonical product page URLimage_link— main product image URLprice— must match the price shown on the product page exactlyavailability— in stock, out of stock, or preorderbrand— manufacturer or brand namegtin— Global Trade Item Number (UPC, EAN, ISBN)condition— new, refurbished, or usedproduct_type— your internal category structurecustom_label_0throughcustom_label_4— optional but powerful for bid segmentation
Upload options: Google Sheets template (good for catalogs under 500 SKUs), scheduled fetch from a hosted file, direct API, or platform sync via Shopify, WooCommerce, or BigCommerce. After upload, Merchant Center processes the feed and flags errors in the Diagnostics tab within 24–72 hours.
Step 3: Link Merchant Center to Google Ads
Inside Merchant Center, go to "Settings > Linked accounts > Google Ads." Enter your Google Ads customer ID and send the link request. Then open Google Ads, navigate to "Tools > Linked accounts > Google Merchant Center," and accept the request. Confirm the link shows "Active" in both consoles before proceeding.
Step four: Set up conversion tracking
Accurate conversion data is what separates a campaign that scales from one that just spends. Set up three layers:
Google Ads conversion actions — create a "Purchase" conversion action in Google Ads (Tools > Conversions). Set the category to "Purchase," assign a conversion value (dynamic, pulled from the order total), and set the attribution model to data-driven.
GA4 ecommerce events — implement
purchase,add_to_cart, andbegin_checkoutevents via Google Tag Manager. Link GA4 to Google Ads so GA4 conversions appear in your Google Ads reports.Enhanced conversions — in Google Ads, enable enhanced conversions for web under your conversion settings. Use Google Tag Manager to pass hashed first-party data (email address from the order confirmation page). This recovers conversions lost to cookie blocking and improves match rates.
Validate everything with Google Tag Assistant and a real test purchase before launching any campaign.
Step 5: Create the campaign in Google Ads
Follow Google's campaign creation flow: click "+ New campaign," choose "Sales" as the objective, select "Shopping" as the campaign type, and choose your linked Merchant Center account. You will then choose between Standard Shopping and Performance Max.

Standard Shopping gives you full control over product groups, bids, negative keywords, and search term reports. Use it first.
Performance Max automates placements across Search, Display, YouTube, Gmail, and Maps using your feed and asset groups. It requires conversion history to optimize well. Start here only after Standard Shopping has generated a solid number of conversions to analyze.
Step 6: Configure campaign settings and launch
Set your campaign priority (High, Medium, or Low) if running multiple campaigns. For a single-campaign launch, leave it at Medium. Choose your target locations (United States, or specific states if your shipping is regional). Set your initial bid strategy to Manual CPC or Maximize Clicks with a CPC cap. Set a daily budget you can sustain for 60–90 days without pausing. Under "Products," confirm the feed is selected and no unintended inventory filters are applied.
Merchant Center diagnostics: what to check after launch
Open Diagnostics in Merchant Center 48 hours after feed upload. The five most common item-level errors and their fixes:
Price mismatch — the feed price does not match the live page price. Fix: update the feed or use automatic item updates.
Missing GTIN — add the manufacturer's GTIN. If the product has no GTIN (custom or handmade), set
identifier_existsto false.Invalid image — image is too small (minimum 100x100 px for non-apparel, 250x250 recommended), contains promotional overlays, or the URL returns a 404. Fix: re-upload a clean image.
Mismatched availability — feed says "in stock" but the page says "out of stock." Fix: sync feed updates more frequently or enable automatic item updates.
Policy disapproval — usually triggered by restricted content, missing return policy, or checkout issues. Fix: review the specific policy cited in the disapproval notice and submit for re-review after correcting.
Ad approvals typically complete within 1–3 business days after feed approval.
Which feed attributes actually move the needle on impressions and CTR?
Feed quality is not a nice-to-have. Complete attributes — especially titles, GTINs, and images — produce measurable gains in impressions and CTR independent of bid levels. Here is how to get each one right.
Attribute checklist
Attribute | Priority | Notes |
|---|---|---|
| Must-have | Most important ranking signal |
| Must-have | Must match page exactly |
| Must-have | Keep in sync with inventory |
| Must-have | Clean background, no overlays |
| Must-have | Required for branded products |
| Must-have | Required for all products |
| Recommended | Use full 5,000 characters |
| Recommended | Helps Google categorize correctly |
| Optional | Bid segmentation, margin tiers |
| Optional | Triggers sale badge in ads |
| Optional | Up to 10 additional images |
Title optimization
Your title is the primary match signal Google uses to connect your product to search queries. The formula that works for most categories: Brand + Key Feature + Product Type + Size/Color/Model when relevant.
Before: "Blue Running Shoe"
After: "Nike Air Zoom Pegasus 41 Men's Running Shoe — Blue, Size 10"
Front-load the most important terms. Google truncates titles in the ad unit, so the first 70 characters carry the most weight. For apparel, lead with brand and gender. For electronics, lead with brand and model number. For consumables, lead with brand and key ingredient or specification.
Image best practices
Use a minimum resolution of 800x800 pixels (1,000x1,000 or higher preferred). White or light gray backgrounds perform best for most product categories. No promotional text, watermarks, or price overlays on the main image. For apparel, on-model images typically outperform flat-lay shots in CTR.
Improving product page quality alongside your feed pays double dividends: better product page optimization lifts both organic visibility and the post-click conversion rate on your Shopping traffic.
Custom labels for smarter bidding
Custom labels let you segment products in ways Google's categories cannot. Practical examples:
custom_label_0: margin tier (high-margin, mid-margin, low-margin)custom_label_1: seasonality (evergreen, seasonal-Q4, clearance)custom_label_2: inventory status (new-arrival, bestseller, end-of-life)custom_label_3: price tier (under-25, 25-to-100, over-100)
These labels carry through to your product groups in Google Ads, where you can set different bids for each segment.
Feed delivery and management tools
Platform sync is the lowest-maintenance option. Shopify's Google & YouTube app, WooCommerce's Google Listings & Ads plugin, and BigCommerce's native Google Shopping channel all push updates automatically when you change a price or mark a product out of stock. For larger or more complex catalogs, dedicated feed management tools like DataFeedWatch give you rule-based transformations, multi-channel distribution, and scheduled reprocessing without touching your product database directly.
Pro Tip: After fixing feed errors, use the "Request review" button in Merchant Center Diagnostics to reprocess only the affected SKUs. You do not need to re-upload the entire feed. Targeted reprocessing is faster and avoids introducing new errors.
The single biggest feed mistake we see: titles that describe the product to a human but ignore how a shopper actually searches. Write titles for the search bar, not the shelf tag.
How should you structure campaigns and bids for the first 60–90 days?
The three-campaign structure that protects branded economics while using Performance Max for scale is the approach we recommend for most SMB stores.
Campaign 1 — Standard Shopping (Brand): Targets branded search queries. High priority. Manual CPC or tROAS once you have data. This campaign exists to prevent Performance Max from consuming your branded traffic at a higher CPA than necessary.
Campaign 2 — Standard Shopping (Non-Brand): Targets category and product queries. Medium priority. Start with Maximize Clicks with a CPC cap during data collection. Segment product groups by margin tier or category so you can see which segments perform before committing to Smart Bidding.
Campaign 3 — Performance Max (Prospecting): Broad reach across all Google surfaces. Low priority initially. Feed it your best-performing products from Campaign 2 once you have 30–50 conversions. Add audience signals from GA4 (purchasers, cart abandoners) to accelerate the learning phase.
Product group structure
Inside Standard Shopping campaigns, avoid the default "All Products" single group. Segment by:
Category (e.g., Men's Footwear > Running > Under $100)
Margin tier (using custom labels)
Bestsellers vs. test SKUs vs. clearance
This lets you bid higher on high-margin products and lower on clearance items without creating separate campaigns for each.
Bidding strategy by stage
Strategy | Control Level | Data Needed | Best For |
|---|---|---|---|
Manual CPC | Full | None | Launch phase, data collection |
Maximize Clicks (with CPC cap) | High | Minimal | Early traffic building |
Target ROAS | Low | 30–50 conversions/month | Scaling proven campaigns |
Maximize Conversion Value | Low | 30–50 conversions/month | Revenue-focused scaling |
Start with Manual CPC or Maximize Clicks. Small daily budgets in the low tens of dollars rarely generate enough clicks to produce reliable conversions, which means Smart Bidding has nothing to learn from. Treat early spend as an experiment, not a revenue engine.
For US Shopping campaigns, average CPCs typically vary depending on category and competition. At a moderate daily budget with an average CPC around a dollar, you get roughly a few dozen clicks per day. At a modest conversion rate, that yields less than one conversion daily. That math is why the 60–90 day window matters: you need volume before automation can help.
Pro Tip: Use campaign priority settings and negative keywords to prevent cross-campaign cannibalization. Add your brand name as a negative keyword in your non-brand Standard Shopping campaign and in Performance Max. Check branded Search impression share weekly in the first 30 days to confirm Campaign 1 is capturing branded queries.
How do you set up tracking and measure Shopping performance?
You cannot optimize what you cannot measure. Get this right before you spend a dollar.
Conversion setup checklist
Create a "Purchase" conversion action in Google Ads with dynamic revenue values
Implement GA4 ecommerce events (
purchase,add_to_cart,begin_checkout,view_item) via Google Tag ManagerLink GA4 to Google Ads (GA4 Admin > Google Ads Links)
Enable enhanced conversions in Google Ads conversion settings
Configure Google Tag Manager to pass hashed email from the order confirmation page
Set attribution model to data-driven (or last-click if conversion volume is low)
Validate before launch
Use Google Tag Assistant to confirm tags fire on product pages, cart, and the order confirmation page. Run a real test purchase and check GA4 DebugView in real time to confirm the purchase event fires with the correct revenue value. Check Google Ads > Conversions to confirm the action shows "Recording conversions" within 24 hours of the test.
KPIs to track
The metrics that matter most in the first 60 days are not ROAS — they are conversion volume and cost per conversion. ROAS becomes meaningful only after you have enough data to trust it.
KPI | Track Weekly | Track Monthly |
|---|---|---|
Impressions | ✓ | ✓ |
CTR | ✓ | ✓ |
Average CPC | ✓ | ✓ |
Conversion rate (CVR) | ✓ | ✓ |
Cost per acquisition (CPA) | ✓ | ✓ |
Return on ad spend (ROAS) | ✓ | |
Impression share (lost to budget) | ✓ | |
Impression share (lost to rank) | ✓ |
For campaign optimization decisions, impression share lost to rank tells you whether feed quality or bids are limiting reach. Impression share lost to budget tells you whether you need more spend or tighter product group focus.
During the initial launch period, look for spend pacing (is the daily budget exhausting early in the day?), meaningful conversion volumes, and signal stabilization (are CPA and CVR trending toward a consistent range?). If spend exhausts early, tighten product groups or add negative keywords. If conversion volume is too low to feed Smart Bidding, stay on Manual CPC longer.
What are the most common Shopping campaign errors and how do you fix them?
Most setup problems fall into three buckets: feed errors, policy disapprovals, and campaign delivery issues.
Feed and item level errors
Price mismatch — Google crawls your product page and finds a different price than the feed. Fix: enable automatic item updates in Merchant Center (Settings > Automatic improvements) or increase feed refresh frequency to daily.
Missing GTIN — required for all products sold by a manufacturer. Fix: source GTINs from the manufacturer or GS1 database. For custom/handmade products, set
identifier_existsto false.Invalid image URL — image returns a 404, is below minimum size, or contains overlays. Fix: re-upload a clean image and update the
image_linkattribute in the feed.Misformatted price — price includes currency words ("USD") instead of the ISO currency code format ("25.00 USD"). Fix: format as a number followed by a space and the ISO code.
Availability mismatch — feed and page disagree on stock status. Fix: sync your feed more frequently or enable automatic item updates.
Policy disapprovals
Policy disapprovals are more serious than item errors because they can affect your entire account, not just individual products. Common triggers include:
Missing or inadequate return policy page
Checkout that requires account creation before purchase
Restricted product categories (supplements, certain health claims, weapons)
Misleading pricing or promotional claims
After fixing the underlying issue, go to Merchant Center > Products > Diagnostics, select the affected items, and click "Request review." Most reviews complete within 3–5 business days. If a review is denied, read the specific policy cited and address it precisely before re-submitting. For persistent account-level suspensions, use the Merchant Center support chat and escalate to a technical partner if the issue involves site-level policy compliance.
Campaign delivery issues
Low impressions — usually caused by bids below the competitive floor, budget exhausted early in the day, or feed errors preventing product approval. Check Diagnostics first, then check impression share lost to rank vs. lost to budget.
Budget spent too quickly — often caused by overly broad product groups or missing negative keywords. Run a search terms report and add irrelevant queries as negatives. Use the ad optimization checklist to work through delivery issues systematically.
Ads not showing — check that the Merchant Center link is active, that at least some products are approved, and that the campaign is not paused or limited by a billing issue.
Use the Ad Preview and Diagnosis tool in Google Ads to check whether your ads are eligible to show for specific queries without affecting your impression data.
What does a 60–90 day Shopping campaign launch plan look like?
The initial weeks are a structured experiment, not a revenue sprint. Here is the milestone framework we use.
Phase | Days | Milestone | Decision Criteria |
|---|---|---|---|
Feed approval | 1–7 | 80%+ of products approved | Fix top errors before proceeding |
First conversions | — | First 5–10 purchases recorded | Confirm tracking is accurate |
30-day learn | — | 15–20 conversions minimum | Evaluate CPA vs. target; stay on Manual CPC if below threshold |
60-day optimize | — | 30–50 conversions; test tROAS | Segment product groups by performance; pause non-converters |
90-day scale | — | Consistent ROAS; launch PMax | Allocate 20–30% of budget to PMax prospecting |
Budget guidance by store size
Early campaigns at very low budgets are primarily diagnostic. The math is straightforward: at $1.00 average CPC, a $15/day budget generates roughly 15 clicks. At a 2% conversion rate, you need 50 clicks to generate one conversion. Thus, a $15/day budget realistically produces one conversion every three days, which is not enough volume for Smart Bidding to function reliably.
Typical budget ranges for SMB stores vary by store size.
Small store (under 100 SKUs, testing): $25–$50/day. Treat this as a data-collection experiment. Do not expect profitability in the first 30 days.
Medium store (100–1,000 SKUs): $75–$150/day. Enough volume to segment product groups and start seeing CPA trends by category.
Larger SMB (1,000+ SKUs, multi-category): $200+/day. Sufficient to run the three-campaign structure and feed Performance Max with conversion signals.
Milestone checklist
Day 7: Feed approval rate above 80%. Top 5 errors identified and fixed.
Day 14: Conversion tracking validated with real purchases. No tracking gaps.
Day 30: Minimum 15 conversions recorded. CPA trending within 50% of target. Search terms report reviewed; first negative keywords added.
Day 60: 30–50 conversions. Product groups segmented by performance. Bid strategy transition to tROAS evaluated.
Day 90: Consistent ROAS trend. Performance Max launched with audience signals from GA4. Scale decision made based on margin-adjusted ROAS.
Pro Tip: Run controlled A/B tests on product group structure before switching to tROAS. Split your catalog into two groups with identical budgets and different bid strategies for 14 days. Feed Google's machine learning with clean conversion data before handing over bid control. Switching to aggressive tROAS targets before you have 30–50 monthly conversions typically causes the campaign to under-deliver.
Key Takeaways
A complete Google Shopping campaign setup requires four elements working together: verified Merchant Center, a complete product feed, active account linking, and accurate conversion tracking before any campaign goes live.
Point | Details |
|---|---|
Feed quality drives results | Complete titles, GTINs, and images outperform competitors in impressions and CTR regardless of bid levels. |
Start with Standard Shopping | Use Standard Shopping for data collection and control; add Performance Max only after 30–50 monthly conversions. |
Budget math matters | At $1.00 average CPC, a $15/day budget generates roughly one conversion every three days — not enough for Smart Bidding. |
60–90 day learning window | Plan for 90 days of signal building before switching to tROAS or scaling Performance Max prospecting. |
Atdigiagency manages the full setup | Atdigiagency handles Merchant Center setup, feed cleanup, conversion tracking, and 90-day campaign optimization for SMB e-commerce brands. |
When should you DIY vs. hire a professional for Shopping setup?
The honest answer: it depends on your catalog size, your tracking confidence, and how much time you can commit to weekly management.
DIY works well when your catalog is under 100 SKUs, your GA4 and conversion tracking are already in place, and you have someone in-house who can review performance weekly and act on what they see. The setup steps in this guide are genuinely executable by a capable marketer in a few days. Standard Shopping campaigns are not black boxes.
The case for bringing in an agency gets stronger fast when any of these apply: your catalog has hundreds or thousands of SKUs with complex variant structures; you are seeing recurring disapprovals you cannot diagnose; your conversion tracking has gaps (missing revenue values, duplicate conversions, or untracked mobile purchases); or you need Shopping to work alongside Meta, TikTok, and Google Display as part of a multi-channel paid strategy. Feed errors at scale are time-consuming to fix correctly, and a poorly structured Performance Max campaign can quietly consume budget on low-intent placements for weeks before you notice.
Agencies typically price Shopping setup as a one-time project fee covering Merchant Center configuration, feed cleanup, conversion tracking implementation, and campaign launch. Ongoing management is usually a monthly retainer covering optimization, feed maintenance, and reporting. What you should expect in return: a clear 90-day plan with defined milestones, weekly reporting on the KPIs in this guide, and a team that escalates feed issues before they affect your spend.
A&T agency builds and manages your Shopping campaigns from day one
Setting up Google Shopping correctly the first time saves weeks of troubleshooting and protects your ad budget from day one. Atdigiagency's Google Ads management service covers the full setup: Merchant Center verification, feed cleanup and ongoing sync, conversion tracking with GA4 and enhanced conversions, Standard Shopping and Performance Max launch, and a 90-day optimization plan with weekly reporting.
We work with SMB e-commerce brands across the US that need campaigns built right, not just built fast. No unnecessary meetings. No guesswork on feed errors. Just a clear plan, clean data, and campaigns that collect the right signals from day one.
If you are ready to launch or want a second opinion on an existing setup, get in touch with our team for a discovery audit.
Useful sources and official documentation
About Shopping ads — Google Ads Help — Google's official explanation of how Shopping ads work, how product data drives ad generation, and what attributes Google uses to match products to queries.
Create a Shopping campaign — Google Ads Help — Step-by-step UI walkthrough for creating a Shopping campaign in Google Ads, including campaign type selection, budget and bidding options, and product group configuration.
Google Shopping statistics 2026 — Koongo — 2026 benchmark data on feed quality as a ranking signal, plus CTR, CPC, and performance benchmarks across categories.
Google Shopping Benchmarks 2026 — FoundryCRO — Category-level CPC, CTR, CVR, CPA, and ROAS benchmarks; includes the three-campaign structure recommendation for managing Performance Max cannibalization.
Is $20/Day Enough for Google Ads? — Store Growers — Practical conversion math explaining why small daily budgets function as data-collection experiments rather than revenue engines, and what the 60–90 day signal-building window means in practice.
Google Ads for Retail: Launch Shopping Ads in 11 Steps — Shopify — Platform-specific integration steps for Shopify merchants, including app setup, feed sync, disapproval handling, and conversion tracking.
Conversion rate optimization tips — Babylove Growth — Practical post-click optimization techniques for improving the landing page experience tied to Shopping traffic.

